Get In Touch

Wednesday, March 27, 2013

Easter Recipe Round-Up

Last Easter, it was 60 degrees outside, sunny, and I wore a skirt to Easter service at church. This year, it snowed, and is about 35 degrees outside. Ugh. The upside of the snow? I got to go sledding one last time. Woo hoo! The down side, it's spring and I'm sick of cold weather. But what can you do....

I know you didn't come here to get the forecast of Indiana weather, so I'll just move onto the recipes. ;)


The perfect treat for Easter Sunday brunch. 

 
What special breakfast is complete with out donuts? Seriously. 


Moist, lemon-y muffins without eggs or dairy! 


The perfect spring color and they taste delicious!


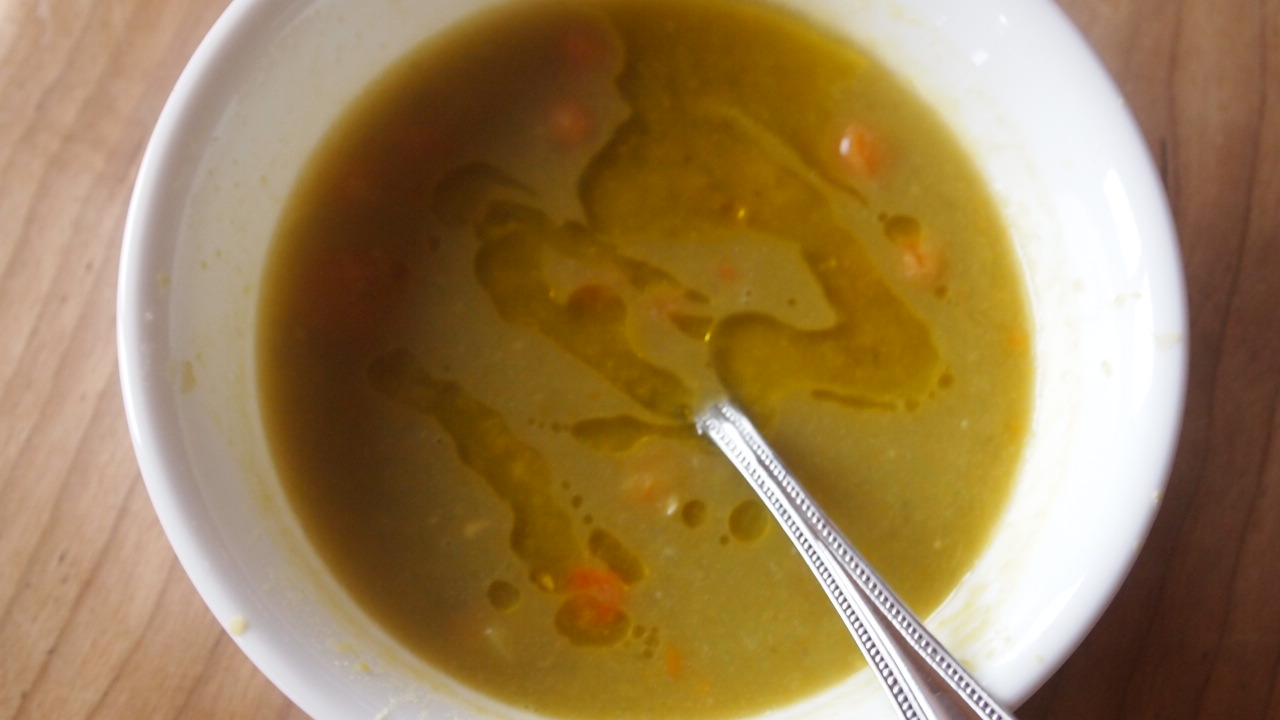
The perfect light dessert for spring. (Even if it doesn't feel like spring!)


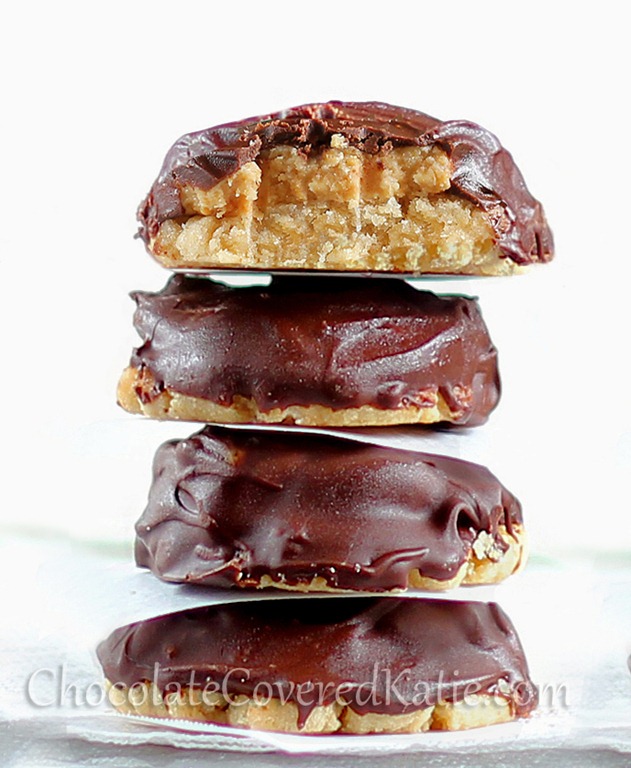
Perfect replacement for all that unhealthy Easter candy.


Also a great substitute for Easter Candy. Who needs jelly beans when you can have PB&J cookies?


Not a ham fan? Try fish sticks! 


Instead of regular fries, try the potato's cousin- sweet potato! 


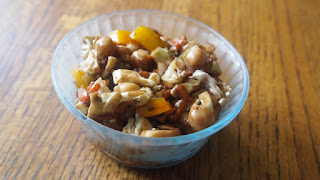
A great spring salad that's crunch, light, and tangy. 


For pancakes, on top of muffins, or maybe even sweet potato fries. It's up to you!


Inquiry of the Day:

What are your plans for Easter?

I'm going to church, of course, then eating an early dinner at my grandparents' house with family. By the way, you probably won't hear from me until after Easter. I'm taking a much needed vacation and won't have time to blog.
Continue Reading...

Monday, March 25, 2013

What Wreck-It Ralph Taught Me

*WARNING: This post contains spoilers, so if you haven't seen the movie Wreck-It Ralph, I recommend you skip this post until you see it.*

A few weekends ago, my family and I watched Wreck-It Ralph together when all of a sudden a thought occurred to me. Every element in a plot, every little detail, is all used for a greater purpose.


You're probably thinking, and how does this relate to Wreck-It Ralph? Well, I shall explain.

In the movie, going "turbo" is mentioned a lot. We find out it means "abandoning your game" soon after, but it's not really explained why the term "turbo" is used. That is until Felix explains the story of Turbo, a character in a racing game who got unplugged, so he tried to take over other games.

When I first watched this part, I was like, "What's the point of this?" Sure it provided background, but there had to be another reason for it.

Sure enough, at the very end, the story of Turbo comes back up again. In fact, Turbo has managed to take over another game, Sugar Rush. He is King Candy, the leader of Sugar Rush. Vanellope, a glitch and also the rightful leader, was in his way. To get rid of her, he erased the memories of the people of Sugar Rush, destroyed Venellope's code making her become a glitch, and said he was the king of Sugar Rush.

This just blew my mind. I totally did not see that coming. It also taught me an important lesson about writing. I learned that stories don't have fluff. Meaning everything is there for a reason. For example, the writers of Wreck-It Ralph didn't add Turbo's background in there just to fill up space. They put it in there so the audience would know Turbo's motives and who Turbo is.

Another example of this is in Harry Potter, when it is said Viktor Krum's wand is made by Gregorovitch. At the time, this detail seems unimportant, but three books later, Gregorovitch is said to have had the Elder Wand! There are tons of examples in the Harry Potter books that prove that everything in a story adds to the plot.  I can name at least six right now.

A lot of my novel is purely fluff. This is where the beauty of revising comes in. I can take out all the scenes that just take up space and add new ones that contribute to the story. Now I understand that every single detail I put in my story must have importance. It must add to the plot. 

How do I determine what's fluff and what's important? I ask myself just one question that can be very hard to answer, "What does this add to the plot?" The tricky part is making sure I don't make up excuses to keep that "scene I really like". If it doesn't move the story forward, it's gone. It really hurts knowing that you'll have to write a chapter all over again, but in the end it's worth it.


Inquiry of the Day:

What did you think of Wreck-It Ralph?

Obviously if you're reading this post you have seen the movie. Unless you don't really care if you see it or not, in which case you read this post and don't have to answer the question. Personally, I loved it! It was a good story, with good characters, and it had some humor The animation was pretty well done, too. Actually, it was a bit like Toy Story. Different plot, of course, but there were a few similarities. 
Continue Reading...

Wednesday, March 20, 2013

Social Media: Where You Can Find Me

I'm trying to get more into this whole "social media" thing. I may sound like an old lady (which I'm not, I swear), but I just don't want the Internet to suck me into it's trap and make me spend whole hours at a time at the computer. Not how I like to spend my days.

But, I'm starting to give in a little bit. So I thought I'd let you guys know where you can find me. You know, places beside the blog.

This way, you can communicate with me in other ways beside commenting on posts. Keep in mind, you don't have to do any of this, they're just suggestions and other ways to contact me. Sound good?

Okay, here it goes:

You can follow me on Pinterest here. I post the pictures for my recipes on there, so you can pin them to your boards if you want. 

I'm also on Tumblr. This blog is solely for my writing. And I'm not quite sure how to use Tumblr yet, so please bear with me while I figure it out.

I have a Facebook page where I post every time I post something on the blog.

And, finally, you can become a member on my blog if you have a Google Plus account.  You can do that by clicking on the button that says "Become a Member" on the right side of my blog.

So, if you have a Pinterest, Tumblr, Facebook, or Google Plus account please follow me, become a member on my site or whatever. I promise I'll follow you back. :)


Sorry, for the slightly boring post. I promise I'll post a new recipe in the next few days and now I have a question for you: what are some of your favorite Easter recipes? Any that you would like me to health-ify?
Continue Reading...

Green Eggs

Okay, I know the eggs look a little bit like green Play-Doh, but they don't taste like it. I promise. And they're a lot healthier than Play-Doh.


This was maybe one of the grossest things I did as a kid, but I used to eat Play-Doh. Please don't judge me! Look backing on it, I'm not sure why I would eat it. Maybe it was the saltiness? Whatever the case, I regret doing it now. Sure, there are worse things I could've eaten, but still. Gross.

Back to the eggs. They are super healthy, because they have quite a bit of saturated fat, vitamin A, vitamin B12 and some iron to boot.


And how did I get them green? Why spinach of course!

3 eggs (For vegan eggs, maybe try silken-firm tofu or a liquid egg replacer)
1 c. spinach (If you really don't want to use spinach, use a few drops of green food coloring instead)
1/8 tsp. garlic powder
1/4 tsp. onion powder
salt and pepper
coconut oil or other fat

1. Add all your ingredients, except the salt and pepper and coconut oil, to a blender. Run it until it's smooth.
2. Heat a small pan over medium-high heat. Once it's hot, grease the pan.
3. Pour your eggs in and scramble 'em until they're to your preferred doneness. I like mine a little wet still, but completely cooked. Sprinkle with salt and pepper to taste.
4. Serve with a side of ham, bacon, pancakes, tofu, or whatever!


Inquiry of the Day:

Did you eat strange things as a kid?

That was an awkward question, but I know some kids would eat sand or dirt or bugs or coins. My question is, why do kids eat strange non-edible things? I wonder what runs through the mind of a toddler.... 

Continue Reading...

Tuesday, March 19, 2013

Sweet and Salty Almonds

I few weeks ago, I took a trip up to my grandma's house. Now, that may not mean anything to you, so let me explain....


My grandma is like a cooking/baking fiend. She's made everything from cake to candy to burgers and sausages (She and my grandpa grind their own meat. It's pretty awesome. And they have the best burgers, bratwurst, and sausage patties ever!). Recently, she made toffee almonds and they were delicious! Crunchy, sweet, and the perfect thing for a little sugar fix.

Unfortunately, the almonds were made with granulated sugar, hence the name toffee, so they weren't very Paleo. It's a good thing I enjoy recreating non-Paleo foods into Paleo ones, because I really wanted to make some healthier toffee almonds of my own! The recipe she gave me didn't seem like it'd take much work to become sugar-free and I was right!


Of course, I added my own flair to the recipe as well. The only ingredients the original recipe called for were sugar and almonds. How boring! I love sweet and salty things so I figured, "Why not add some cracked sea salt on top?" The result was a different texture than the almonds made with regular sugar (the regular weren't as sticky), but they were still perfectly delicious.

These would be perfect with yogurt for a small dessert, on top of fruit, or just by the handful as a snack. That last one is my favorite way to eat them. ;) 


1 1/2 c. almonds (whole, sliced, diced, etc.)
1/3 c. honey (maple syrup or agave would work, too)
cinnamon
sea salt

1. In a small pan on medium-low heat, stir in almonds and honey.
2. When the honey is thinner and syrup-y, spread almond mixture onto a greased tin foil sheet that's about a foot long.
3. Sprinkle almonds with cinnamon and sea salt.
4. Let cool and store in the fridge or freezer.


Inquiry of the Day:

Was (or is) your grandma a good cook?

My mom's mom definitely is. I love going to her house, it always smells like food! My dad's mom isn't as big of cook, but she makes excellent ham.

Continue Reading...

Monday, March 18, 2013

Mint Coconut Whipped Cream: Three Ways!

I first got the idea for mint coconut whipped cream when Chocolate Covered Katie posted her recipe for it. It looked so delicious, I couldn't resist making my own.


So Saturday, I pulled out a can of Trader Joes' coconut cream, whipped it to stiff peaks, added some peppermint extract, green food dye, honey, and voila! Delicious coconut whipped cream.

I've made coconut whipped cream a few times before, but I've always made the plain kind with just vanilla extract in it. Albeit delicious, it's very boring. But this stuff, oh my gosh, this stuff, is amazing. I could eat a whole bowl of it! And it does just about anything. Use it as a pudding, frosting, filling, topping for pancakes, stir it into oatmeal, a cool whip replacement, or even- ice cream.

That brings me to my next point. I didn't just use the cream for one thing. I used it to make three different desserts! Yes, it's that versatile!


 The first way was a filling for cupcakes. The  "Hostess" cupcake recipe is Michelle's (She runs the blog Gluten Free Fix and I really urge you to go check it out! Amazing recipes and she has the cutest baby!). Her recipe says to fill the cupcakes with regular whipped cream, but I wanted something green and St. Patrick's Day-ish. Thus the mint version of a Hostess cupcake was born!

The second way I used it was as whipped cream. I used it to top ice cream. And, by this point, I bet you can guess what kind of ice cream I made..... ;)

But to make the ice cream, you have to make the whipped cream first.

1 can coconut cream (I use Trader Joe's. Full-fat coconut milk will also work, but make sure you refrigerate it overnight.)
1 1/2 tsp. peppermint extract
sweetener, to taste (Make sure to make it overly sweet if doing the ice cream option. It'll be less sweet once frozen.)
a few drops of green food dye
chocolate chips or broken up pieces of a good chocolate bar or maybe even thin mints!

1. If not using coconut cream, refrigerate one can of full-fat coconut milk overnight. It must be full-fat!
2. Scoop out the coconut cream from the top into a large bowl. Leave the watery stuff in the bottom and use for smoothies.
3. Using an handheld mixer, beat the cream until it forms stiff peaks.
4. Add in the peppermint, sweetener, food dye, and chocolate chips. Whip until it is all mixed in. Alternatively, if just making ice cream, run all the ingredients in the blender and add a tablespoon or so of the coconut water. If using this method, I would put some spinach in too instead of the food dye.
5. At this point, what you do with your coconut whipped cream is up to you. For ice cream, put in ice cream and let it run for about 10-15 minutes. During the last five minutes, add some chopped chocolate or chocolate chips. You can also use it as a frosting/filling for cupcakes or brownies. Or eat by the spoonful!


Inquiry of the Day:

Did you do/make anything special for St. Patrick's Day?

This is probably the tastiest thing I've ever done to celebrate St. Patrick's Day. And I know it's that good, because the two batches I made lasted only two days in my house. ;)
Continue Reading...

Sunday, March 17, 2013

St. Patrick's Day Recipe Round-Up

I know, I know. Today is St. Patty's day, but better late than never, right?

To start my day off today I had green eggs. Made with spinach, of course! They were awesome and maybe I'll post the recipe soon if you guys want. I also had the Paleo Parents pancake recipe with mint coconut whipped cream and melted chocolate. It was like dessert for breakfast!

I was going to post the mint coconut whipped cream recipe, but we ate it to fast for me to get a picture! I promise I'll post it tomorrow, though. I'm very excited to share it. :) 

I don't have a whole lot of St. Patrick's Day recipes, unfortunately, but hopefully the ones that I do have will be enough!

To make St. Patrick's Day-ish get rid of the cherry preserves and add some mint extract!
Not exactly green, but they are green in spirit!
Basically, you can beef stew for any holiday/event.

Filling, hearty, and perfect for a cold, March day.
Perfect for pizza, spaghetti, on top of fish or chicken, use your imagination! I'd even try it with eggs. ;)
Sneaky Berry Smoothie
I know it doesn't look green, but it has spinach in it. So I included it anyways.


St. Patrick's Day Recipe Round-Ups/Recipes From Other Bloggers:

Healthy St. Patrick's Day Recipes from Katie at Chocolate Covered Katie
Naturally Green St. Patrick's Day Recipes from Matt & Stacy at the Paleo Parents (I can personally say the Green Curry with Shrimp is amazing!)
Green Eggs from Elana at Elana's Pantry


Inquiry of the Day:

 How do you plan to celebrate St. Patrick's Day?

I'm eating all the green food I can get my hands on! Green eggs, green curry, green coconut whipped cream, salad, etc.


Continue Reading...

Wednesday, March 13, 2013

Paleo Crepes- Single Serving

Fluffy, pliable, and the exact replica of a wheat-based crepe. Okay, maybe not the exact replicable, but pretty darn close. Considering they're nut-free, dairy-free, soy-free, gluten-free, AND grain-free, I'd say I did a pretty good job. :)

This crepe is filled with peppers, onions, a jalapeno chicken sausage and topped with "Not-so Cheese" Sauce (from the Vita-Mix cookbook

Crepes, in my opinion, are one of the most versatile foods in the world. You can fill them with just about anything and have a delicious meal. Berries, whipped cream, nut butter, jelly, ham, cheese, chicken, vegetables, bacon- the list goes on. I chose to put sunflower seed butter and jelly in mine, but I think next time I'll go a more savory route and fill it with eggs and a chicken sausage.

Because this is a single serving recipe, it's also customizable. Plus, it's super easy. :) You can make one crepe and put chocolate chips and strawberries in it, then whip up another and fill it with bacon and eggs.


Now, time for a back story.

When I was in elementary school, my mom would make us crepes for breakfast. They were easy, quick, and my sister and I loved them. Of course, we put chocolate chips in them usually. And topped them with whipped cream, so they weren't the healthiest breakfast. But it's better than Pop-Tarts right? I know, not by much.

Anyways, I was feeling very nostalgic a few days ago and decided to Paleo-ize the crepes I had loved as a kid. And I'm very pleased with the way they turned out!


1 egg
4 T. non-dairy milk (I used unsweetened vanilla almond. I haven't tried it with any other milk, but I'm pretty sure it'll work)
1/4 tsp. vanilla (leave out vanilla for savory crepe)
1 1/2 tsp. coconut flour
2 tsp. tapioca starch
pinch of salt
coconut oil (or other cooking oil of choice, I think bacon grease would be great for a savory crepe)

1. Beat egg in a small bowl and stir in milk.
2. Add the rest of the ingredients and whisk until there are no lumps in the batter. It should be fairly runny.
3. Preheat a non-stick skillet on medium heat. Once it's hot, coat the bottom of the pan in coconut oil. I needed about half a tablespoon.
4. Pour batter into skillet and swirl it around in the pan until the batter completely coats the bottom. Alternatively,  you can pour the batter in and use a spatula to spread it out a little bit. The result will be a little thicker crepe and it won't be circular.
5. Cook for about 3 minutes with the lid off. When it is stable enough to flip, flip it and cook for another minute or so.
6. At this point, you could add your fillings and, if they need to be melted, keep your crepe in the pan with the lid on. This is great for melting chocolate or cheese.
7. Carefully slide out of the pan onto a plate and top with whatever you want. :)


Inquiry of the Day:  

What did you have for breakfast as a kid?

Brown sugar and cinnamon Mini-Wheats was one of my favorite breakfasts. And I had Coco-Wheats pretty regularly, too. Healthier than some of my friend's breakfasts, definitely, but it wasn't really "brain" food, if you know what I mean.

By the way, if you're having trouble coming up with crepe fillings I found a whole website dedicated to crepes!
Continue Reading...

Monday, March 11, 2013

Still Revising...

So remember when I wrote that post about a month ago on revising? Well I'm still doing the first read through. >:(

But, the good news is, because I'm stuck on the first read through, it's made me realize a few things.

1. My book is boring

This isn't to say all of it is, but, most of it happens to be very dull. I think I was just trying to fill up space. Getting in 1,666 words a day every day for a month is hard work. Towards the end, I just kept plugging away not really comprehending what I was writing. Now, looking back, I want to bang my head against a wall. But I don't. Because I really don't want a concussion. ;) So, once the first read through is over, it'll be time to churn out non-boring scenes!

2. The characters are lifeless

Even my main character has, like, no emotion! I know I've stressed this before, but it is my major weakness when writing. Basically all my other characters are just "there". Originally, I wanted all of them to be fully involved. I wanted each character to have a purpose. But right now, I might as well make the MC the only character on the planet. No, I might as well make there be no characters! *sigh* Building characters will be super hard. Much harder than making exciting scenes.

3. The setting isn't very strong

I feel like that my setting is like a very thin frame. In some places it stands pretty straight, but in others it's crumbling. To fix this, I've decided to write a few pages solely based on the history of the world I've created and what it's like "now". Like my characters, the setting isn't fully developed. It's just sort of hanging there, half made. The frame needs to be covered and embellished. Obviously, the setting isn't going to be perfect after the first draft, so I should've expected this.

I also set my expectations too high. I wasn't really concerned with revising. I thought maybe one or two rounds and I'd be good to go. Unfortunately, that is not the case. I'll probably be doing at least four. Sometimes I feel really overwhelmed and like I'll never finish. But then I remember that each day I revise the closer I get to perfecting it. And then I start on the sequel. ;)

Those are the major problems I've noticed. The others aren't big enough to mention here. They're just small things like re-wording sentences and character's mysteriously losing possessions.  No big deal. ;)

Continue Reading...

Tuesday, March 5, 2013

Gluten-Free Girl Scout Cookie Recipe Round-Up

You know that the time is here. The girls in their green sashes are knocking on your door or stalking you at the grocery store, begging you to buy cookies. You hate to say no to them but what will you do with a box of gluten-filled cookies? Give them to your friends or family so you can poison them with hydrogenated oils and artificial ingredients? I don't think so. Lots of bloggers out them have set out to create healthier Girl Scout cookies. Healthier, and, dare I say, tastier cookies.

So don't despair. You can partake in Girl Scout cookie eating, too! Without all the sugar, fake ingredients, and gluten! In fact, most of these recipes are vegan or can be easily converted into vegan recipes. Oh, happy day!

Now, what do you do about the Girl Scouts? Donate money! You don't have to buy a box of cookies, just donate $3.50 and your still supporting your local Girl Scouts without bringing junk into your home.

But, you're here for the cookie recipes so I shall delay them no further. ;)

Tagalongs by Katie at Chocolate Covered Katie (My first favorite Girl Scout cookie)
CCK's photo

Thin Mints by Elana at Elana's Pantry (My second favorite Girl Scout cookie)
Photo from Elana's Pantry
 Samoas by Elana at Elana's Pantry 

Do-Si-Dos by Angela at Angela's Kitchen 
Photo taken by Angela
 Samoas by Brittany at Real Sustenance
Photo taken by Brittany
Treefoils by Stepahnie O'Dea at Totally Together
Photo taken by Stephanie
 Lemonades by Nicole at Gluten-Free on a Shoestring 
Photo taken by Nicole

(Yeah, I was lazy and didn't take any of my own pictures.)

I hope this satisfies your Girl Scout cravings! I've tried Elana's Thin Mint recipe and it was amazing! Next on my list is CCK's Tagalong recipe. I can't wait to make them this weekend! Hopefully I'll be able to experiment in the kitchen soon for either a Mango Creme or Lemonade cookie recipe.


Inquiry of the Day:

Mango Cremes or Lemonade cookies?

You pick! I promise I'll try to make them, but I can't guarantee how long it will take. ;)
 
Continue Reading...

Monday, March 4, 2013

Crockpot Apple Butter


I'm sorry for my absence. The family and I took a vacation this past weekend and I wanted to take a little blogging break. But I'm back now! And with a new recipe to boot!

Normally, the second ingredient in any apple butter at the store is sugar. It doesn't matter what form of it: evaporated cane juice, high fructose corn syrup, or just plain beet sugar. Even Trader Joe's Honey Apple Butter has sugar as the second ingredient.


I really wanted apple butter for days, but didn't want all the sugar that came with it. The only way to do that would be to make it myself. *sigh* Another thing to make. That's what I thought.


 When I first set out to make apple butter I thought it would be a lot of work. But it really wasn't! The most I had to do was prep the apples and stir every hour or so. It'd be the perfect thing to make on a day when you're stuck inside.


The butter isn't too sweet and not too tart. Most commercial apple butters don't have enough spice for me, but this one is full of spice. I wasn't disappointed at all. Especially when I smothered this muffin and this biscuit with the stuff. Oh it was so good.

Even though apple season is over, that's no reason to not make apple butter, which is good any time of the year. ;)

2 lbs. apples (I used Pink Lady. Use tarter apples such as Granny Smith if you prefer tarter butter)
1 c. apple juice (To decrease the amount of sugar, try water)
1/4 c. honey
1/4 c. maple syrup
1 tsp. cinnamon
1/2 tsp. nutmeg
1/4 tsp. ground ginger
1/4 tsp. cardamom
1/4 tsp. cloves

1. Peel, core, and slice apples. Add to crock-pot.
2. Stir in the apple juice, cover, and put crock-pot on high. Stir about every hour until the apples are dark brown and mushy. This took me about four hours.
3. Switch crock-pot to low and add the rest of the ingredients. Keep the lid off and cook for an additional 4-5 hours or until the apple butter is to the consistency you prefer. Make sure to stir about every hour so the honey/maple syrup doesn't burn.
4. Keep in the fridge in a glass container. Spread on English muffins, toast, biscuits, muffins, or anything else you desire.


Inquiry of the Day:

Sweet or tart apples?

I've always loved sweet ones. Give me Fuji, Gala, or even Honeycrisps, and I'll eat them. 
Continue Reading...

Followers

Social Media