Get In Touch

Sunday, June 30, 2013

Fixing Minor Problems: Step Three of Revising

I've got some pretty exciting news! Well, it's exciting to me anyways...

I finished my second draft! Woo hoo! :D Now it's actually starting to look more like a story. After spending three whole months on it I'm so relieved to have finally finished the hard edits. Rewriting lots of scenes was involved. Adding conflict, developing characters, making dialog sound realistic, it's hard stuff! Hopefully, this next round of editing won't be so hard.


I'm already starting to make a list of things that need to be changed. I would share that with you, but I don't want to give away anything about my novel yet. Sorry to disappoint! I promise as soon as I finish all the edits I will reveal some information.

Anyways, step three is fixing the minor stuff. So instead of looking at the story as a whole, I look at it piece by piece. Chapter by chapter. This, for me, is easier. I don't have to worry about what's going to happen or what has happened, I just focus on the now. Of course, I will have to look ahead or behind occasionally, just to make sure that people who become injured aren't magically healed without an explanation or something of that sort...

Fortunately, I've pretty much revised chapters one and two to almost perfection. (One more thing to check off my list, yay!) I have the contest I entered to thank for that. But I'm sure my beta-readers will find some flaws with it. And that's perfectly okay. I want to make it better. In fact, I'm always striving to make my story the best it can possibly be.

Of course, my manuscript is never going to be 100% perfect. That's not the way writing works. It will always have some sort of flaw. But the goal isn't to make it flawless. It's to make it the best that it can possibly be. So after I finish one draft, I dive right back in to continue editing. This will keep going on for the next couple months. By the end of it all, I hope to emerge as a stronger writer and take pride in my accomplishment. And then start on the sequel. ;)


Inquiry of the Day:

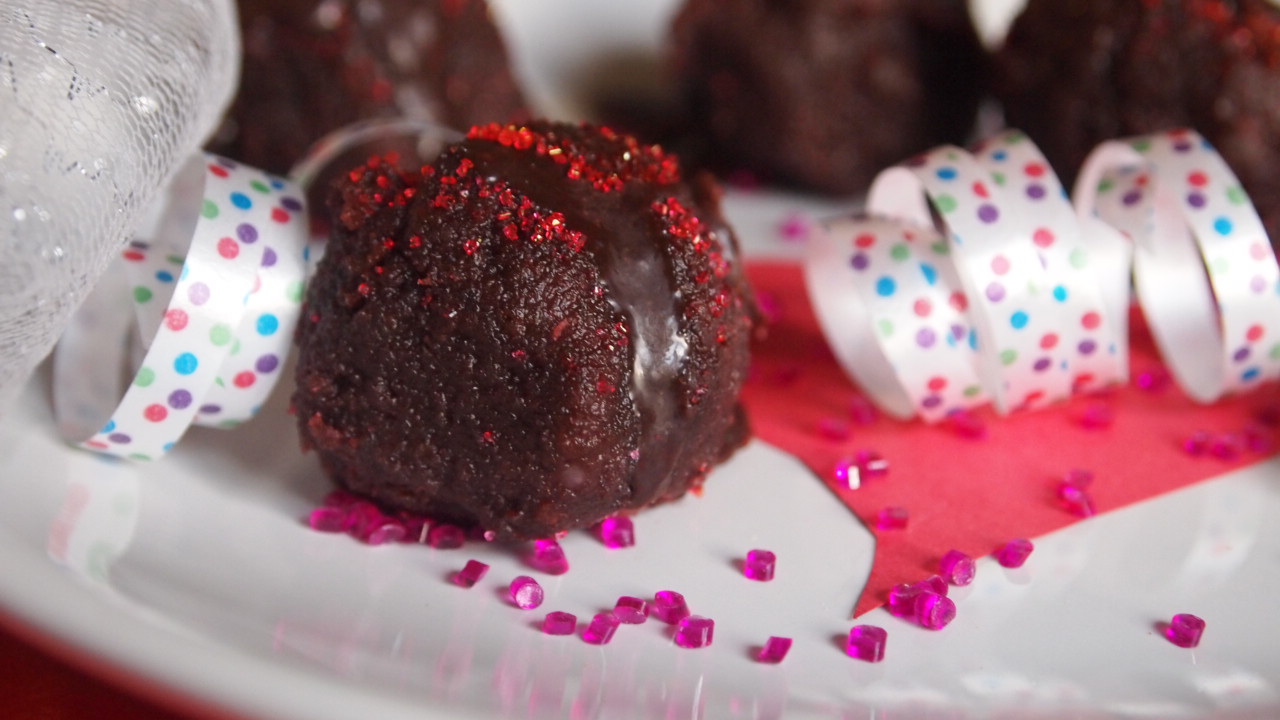
On a totally unrelated subject, which would you like to see first: chocolate banana muffins or rhubarb muffins?  ;)
Continue Reading...

Thursday, June 27, 2013

"PB" Chocolate Chip Nut Balls

I've always been a fan of the peanut butter chocolate combination. They're my two favorite foods. And when you combine them? Wonderful, magical things happen to my taste buds. It's no wonder why my favorite candy is chocolate peanut butter cups.


The nut balls (I really need to find a better name for them...) kind of remind me of Reese's. Same flavor, just different texture. And I'm okay with that. The taste is what I like best anyways. ;)

These nut balls are all peanut butter tasting with pieces of chocolate in almost every bite. Kinda like peanut butter cookie dough with chocolate chips. The best part is, these are easy to make and only have 6 ingredients! They're also perfect for the pickiest of eaters. My sister's friends is one of the pickiest eaters I know and she loved these. Score!


Lately I've been trying to decrease the amount of dessert I've been eating (birthdays, vacations, and weekends all start to add up), but when a chocolate craving strikes I need chocolate. Bad. I wanted to make something small that satiated my craving and these do perfectly.

1/2 c. chopped dates
1/2 c. walnuts
1/2 c. almonds
2 T. nut or seed butter of your choice (I used TJ's sunflower seed butter)
1/2 T. cocoa powder
pinch salt
3-4 T. chocolate chips
optional: 2 T. of chia seeds or flax seeds

1. Add the dates and the nuts to a food processor and blend until they reach a coarse consistency.
2. Then add the nut or seed butter, cocoa powder, and salt. At this point, you can add the chia seeds or flax seeds if you want. Pulse to combine. 
3. Stir in the chocolates then form into balls or bars.
4. Freeze for at least 20 minutes then enjoy!


Inquiry of the Day:

Can you come up with a better name besides nut balls? That's what they are (ground nuts and fruit in the shape of balls), but the name just does not sound appetizing...
Continue Reading...

Tuesday, June 25, 2013

Rhubarb Crisp


As you all know, my grandma is a farmer. Not the kind with the cows and chickens and pigs, but she grows a LOT of vegetables. She also happens to grow rhubarb. Last year was kind of a dud year for growing rhubarb, but this year? One of leaves is over three feet across! It's huge! Suffice to say, she's got a ton of rhubarb.


My first excursion in the world of rhubarb was to try to recreate my grandma's rhubarb crisp recipe. At first I thought it'd be pretty easy. Boy was I wrong! It took a lot of converting to make gluten and mostly sugar free.


But I made a pretty neat discovery, toasted coconut makes a great substitute for oats! And it gives the crisp a delicious slightly coconut-y taste.

 Now that I made rhubarb crisp, I need more ideas for what to do with all the rhubarb I have! Rhubarb jam? Custard? Muffins? Can you think of any recipes that aren't dessert related that have rhubarb? I need all the ideas I can get!


So be expecting more rhubarb recipes. By the end of the summer you'll probably be sick of it. ;) But I don't think I could ever get sick of rhubarb.

Filling:
4 c. chopped rhubarb
1/2 c. honey
2 T. almond flour
2 T. tapioca starch
1/2 tsp. cinnamon
1/4 tsp. nutmeg

Topping:
75 g tapioca starch
50 g almond flour
1/4 c. brown sugar (or date sugar, maple sugar, etc.)
1/4 c. honey
1/4 c. + 1 T. toasted shredded coconut or 1/2 c. rolled oats
1/2 c. butter or coconut oil, melted

1. Wash and cut up your rhubarb. You want to slice it pretty thin.
2. In a large bowl, combine the rhubarb, honey, almond flour, tapioca starch, cinnamon, and nutmeg. Mix it all together until well combined. Pour into an 8x8 baking dish.
3. Preheat oven to 350 degrees F.
4. While your oven is heating up, combine all the topping ingredients in a large bowl.
5. Sprinkle on top of rhubarb filling.
6. Bake for 45 minutes or until topping is golden brown.
7. This crisp is great on its own, but ice cream and/or whipped cream takes it to a whole other level!


Inquiry of the Day:

Any favorite summer recipes you'd like to see health-ified?

Seeing as how frozen treats are perfect for summer, I'm all for vegan-izing ice cream or frozen yogurt. Just let me know you're favorite flavor and I'll try to come up with a healthier version of it!

Continue Reading...

Sunday, June 23, 2013

Raw PB&J Cookies

I'm extremely sorry for my lack of posting. It's been a crazy past week! I've had trouble sleeping all week and the last thing on my mind was posting recipes. But hopefully things will be back to normal soon! July should be much less hectic than June... We'll see, though.

Sunday, August 19, 2012

Today's recipe is definitely an older one, but delicious all the same! You would never know this recipe doesn't actually have any peanut butter in it! I know, I'm sneaky. ;)

 Originally, I was gonna post this recipe tomorrow. But they were so good I just couldn't wait!

Think of peanut butter and jelly in the form of a soft, delicious cookie. Yum, right? I'm seriously addicted to these. A-D-D-I-C-T-E-D!I had to stop myself from eating more than just one, because I was so full already.


I recommend doubling or tripling the recipe, because it only makes 9. That is not enough to feed my obsession. Not near enough!

You have to try these. You just have to. Your life will never be the same when you do.


2/3 c. dates
1 1/2 T. coconut butter
very scant 1/8 tsp. salt
1 T. almond butter
1/4 tsp. vanilla
grape jelly

1. Blend dates, coconut butter, and salt in food processor (I haven't tried this in the blender so I don't know how well it would work, but if you try it, let me know the results!)
2. Add almond butter and vanilla. Pulse until thoroughly combined.
3. Form mixture into 1" balls and place on a paper plate. Make a thumbprint in the middle of the cookie.
4. Freeze for 15-20 minutes.
5. When cookies are firm, place grape jelly in the thumbprint on the cookie.
6. Freeze again until firm.
7. Eat until all gone!!! (No need to share, unless your mom tells you to. Then you have to ;)
                                        or
To make these completely raw, blend in dried cherries or raisins during step 2. Freeze until firm.

Substitution Notes: You can replace the dates with prunes, raisins or any other dried fruit. I just vouch for the results since I've only tried dates. Coconut butter can be found at most health food stores, but be warned. It's very expensive ($12 a jar). So go here to find out how to make you're own. I suppose it can be replaced with more almond butter or maybe you can try omitting it completely. If you do, let me know how it works. The almond butter can be substituted for any nut or seed butter and the jelly for any kind of jelly or preserve. I used grape jelly and cherry preserves for mine. Please share in the comments if you try any of these! I'd like to know how they turn out!


Inquiry of the Day:

Do you like peanut butter and jelly? If not what kind of sandwich do you like?

When I was in elementary school, I would bring a PB&J for lunch almost everyday. I never got tired of it. It doesn't smell like tuna, or got slimy like ham, it stays perfect. Unless you put too much jelly on and it leaks through the bread. My sandwiches looked like zombie PB&Js' when that happened.
Continue Reading...

Wednesday, June 19, 2013

Vegan Blueberry Peach Muffins

Due the fact that I'm short on time, I'm just going to repost one of my old recipes. I like to avoid doing this but I'm going to make an exception for this week and return to my regular posts by next Sunday. And you should be excited for the new recipes I've created. ;)

 Okay, I promise this'll be the last muffin recipe for awhile. (That is, unless y'all want more????) But I swear that these are so one of the best muffins you'll ever eat. In fact, they're my favorite muffin recipe of all time.


A week or so ago, my mom bought a ton of fresh peaches and blueberries from the farmer's market. They blueberries were so good I just knew they had to be put in a muffin. (I think that baking blueberries brings out their natural sweetness, which is why I love blueberry muffins so much.)

So I hope you can forgive me for posting another muffin recipe, but I urge you to try it. Seriously. Go ahead.

Oh, and did I mention they're vegan too?


2 c. almond flour
1/4 tsp. salt
1/2 tsp. baking soda
1/2 T. cinnamon
2 flax or chia "eggs"
1/4 c. grape seed oil
1/3 c. honey
1/2 c. blueberries
1/2 c. peaches, peeled and diced

1. Preheat oven to 350 degrees F.
2. Whisk flaxseed meal in a bowl with water. Let sit for a few minutes, stirring occasionally.
3. Combine dry ingredients.
4. Add oil and honey to flax egg.
5. Add wet ingredients to dry. Add blueberries and peaches. Stir until thoroughly combined.
6. Line muffin tin with cupcake liners or grease with oil. Fill cupcake liners until 2/3 full.
7. Bake for 20-23 minutes or until toothpick inserted in the middle comes out clean.


Substitution Notes: Replace the flax eggs with real eggs if you want. The grape seed oil can be subbed for any other you normally use for baking (i.e. vegetable, canola, coconut, etc.) and the honey for agave or maple syrup. If you don't want peaches bump up the blueberries to 1 c. or vice versa.


Inquiry of the Day:

Have you made a trip to the farmer's market yet this year?

Sad to behold, we've only gone twice. I usually love going to the farmer's market, but it always seems to slip my mind........
Continue Reading...

Friday, June 14, 2013

Father's Day Recipe Round-Up

To be honest, I completely forgot Father's Day was this Sunday. Thankfully, my dad's birthday is a few days after so we just combined the two. Whew, don't have to worry about that now. ;) We did get him a card, though.

Your dad's birthday might not be in June, however, and you just might be looking for some Father's Day recipes to feed dear old dad. If your dad is anything like mine, steak, potatoes, and dessert are all it takes to make him happy. Oh, and action movies. ;)

This Father's Day, we'll probably have burgers on the grill, oven baked fries, and salad. And then my mom, sister, and I will send him downstairs to watch an action movie while we watch a chick flick. Just kidding! Or maybe not....


Inquiry of the Day:

Does your dad like action movies?

Don't get me wrong, I love the Marvel movies, Star Trek, Star Wars, Harry Potter, etc. But if there's too much action and hardly any plot, then you can count me out.
Continue Reading...

Wednesday, June 12, 2013

Potato Chip Burgers

I'm pretty sure I've mentioned before that my grandpa grinds his own meat. And nothing can really compete with fresh, juicy burgers. Especially the frozen kind, which are like cardboard compared to homemade burgers. Even Trader Joe's and Costco don't match up to my grandpa's beef. Whenever I go over to their house they make burgers. And I eat them with my grandma's homemade pickles and the onions they grew in their humungous garden... Okay, so maybe I'm a little spoiled. ;)


Anyways, in my world, there are two kinds of burgers: thick and juicy and thin and crispy. Both kinds, to me, are delicious, but it really depends on what mood I'm in. A few days ago I was in a "thick and juicy" mood. And frozen Costco burgers are not thick and juciy.

So, after lunch I pulled out a frozen bag of ground beef and let it thaw all afternoon. When I tried to form it into patties, the meat just fell apart! I don't know what I expected really. Maybe for it to magically stick together. But, obviously, it did not. So what to bind it with? Potato chips. :)


I know, I know- techinally, potato chips aren't Paleo. But they're something my family splurges on. Probably not a good thing for my waistline, but I love them. ;) You could say I have an addiction, but I'm working on it. Trust me, too many carbs are not good for my "pipes" or my hips! As an occasional treat they're definitely healthier than McDonald's fries or something like that. These burgers are definitely a treat. Good thing they're healthy! ;)

1 lbs. ground beef (Or pork, chicken, turkey, etc. I don't know if any meat-less meat would work, but you can try! Maybe even use black beans or something like that)
1 egg (or flax egg)
1/4-1/3 c. finely crushed potato chips (for a Paleo version, try using crushed pork rinds)

1. In a large bowl, combine all of the ingredinets.
2. Form into patties. I made five fairly thick, but wide patties. However, you can shape them whatever way you want.
3. To cook them, you can either pan fry in a greased medium-high heat skillet (about 2-3 minutes per side, depending on the size and thickness of your burger) or grill them over high heat for about 2-3 minutes per side. Some pink on the inside of the burger is a good thing, you don't want them to be super tough and chewy.
4. Serve with a lettuce leaf for bun and whatever other toppings you want.


Inquiry of the Day:

What foods do you splurge on?

Sometimes, when my family goes out to eat, I'll order something that has grains in it or legumes, but for the most part I try to stay Paleo. I espeically like to splurge with Indian food. I love chick peas and their in almost every dish!
Continue Reading...

Monday, June 10, 2013

Cinnamon French Toast

Crunchy on the outside, fluffy on the inside. That's how French toast should be. Add some cinnamon and a little bit of sugar and you have a pretty close replication of those frozen French toast sticks they sell at the grocery store. Without the laundry list of ingredients!  


About a week ago, my family took a weekend trip and the hotel we stayed at had a breakfast buffet. Surprisingly, it was pretty easy to stay Paleo there. I just stuck to the basics, eggs, sausage, hash browns, fruit, etc. And normally I'm fine with watching others eat gluten filled food, but the French toast sticks almost broke me down. They were golden, fluffy rods of pure sugar. What's not to like? Well... the gluten. That's what's not to like. But don't fret! I didn't completely lose my will power and have a bite. Instead, I went into the kitchen to create my own French toast (when I got home, that is).


To be honest, whenever my mom made French toast for my sister and I as kids, I didn't really like it. Unless, of course, it was drenched in maple syrup. I'm not sure why I didn't. It might've have had too much of an egg-y taste for me, but I'll never know.

However, this French toast doesn't have an egg-y taste whatsoever. And it's super customizable to any dietary needs. Don't care about grains, but care about the gluten? Use whatever gluten free bread you have on hand. Want some whole grains? Use whole grain bread. Need it to be egg free? Use extra milk (non-dairy or dairy). Vegan? Use egg replacer or non-dairy milk. Sugar free? Replace the evaporated cane juice with coconut crystals, date sugar, maple sugar, etc.

Like I said, super customizable. But 100% delicious!

*I used this recipe for the bread

12 slices bread (When I baked my bread I baked it in mini loaf pans, so if using regular sized bread, cut it into quarters)
1 egg (or 1/4 c. milk)
splash of milk
1/4 tsp. vanilla extract
1/4 c. evaporate cane juice
1-2 T. cinnamon
oil to grease pan

1. Beat the egg in a small shallow bowl.
2. On a separate plate, mix together the sugar and cinnamon.
3. Heat your griddle to medium heat. When it's hot, grease your pan. I use either butter or coconut oil.
4. Dip the bread into the egg, then coat with the cinnamon sugar mixture. Lay into the pan. Do this with the remaining slices of bread.
5. When the underside of the bread is golden or dark brown in color, flip it.
6. After 30 more seconds to a minute, check to see if the other side of the bread is golden in color. If it is, remove the French toast from the griddle. If not, cook a little longer.
7. Serve with crushed pecans, maple syrup, chocolate chips, etc.


Inquiry of the Day:

Are you a fan of French toast? Was there ever a point in your life when you weren't?

Continue Reading...

Thursday, June 6, 2013

Writing the Second Draft

The other day I was thinking, "Hmm... I haven't posted much about my writing lately. Maybe I should do that." Honestly, there really isn't much to say except that it's hard work. The hardest part, I think, is finding the time to do it, then actually editing. It takes me awhile to psyche myself up enough to start writing. And I thought writing the actual novel was hard....

Thankfully, I'm almost finished with the major edits (meaning I'll be done by the end of the month) and then it'll be on to round two. I hope that'll be a little more enjoyable. As soon as I finish the second draft I'll post what I plan to do.

But for now, I'm mostly fixing things. Developing characters, adding depth to the plot, creating new scenes, etc. It's hard stuff!

Developing characters is definitely something I struggle with. For a while, I wasn't sure how to do it. I understood that the characters needed to be different, but I didn't know what they meant. I spent a long time trying to figure it out. Was it the back story? The motives? Their unique traits?

It is all of those things, but the most important part of making a character seem truly lifelike is their actions and their voice. What do they do? How do they react? What are they like? When I realized this creating real characters became easier. Once you figure out how they react everything else falls into place.

For example, say our supporting character (we'll call him Jerry) is pretending to be friends with the MC (who is trying to save the world from a robot invasion), but is actually working with the robots. We know Jerry's actions, but why would her turn his back on his best friend? Obviously Jerry is reacting to something, the question is, what is it? That's where the motives come in. Maybe the MC hurt Jerry a long time ago and Jerry is finally getting the chance to have revenge. There's the motives, then comes the back story. The back story is the absolute last thing that should be revealed. What did the MC do to Jerry? It's what keeps the reader confused, but hanging on to find out what happens next.

I'm not saying that I know the exact formula for developing characters or that I'm particularly good at it, but, from my experience, this is what seems to work.


Inquiry of the Day:

Who are some of your favorite supporting characters?

Severus Snape in Harry Potter is one of my favorites. J.K. Rowling does such a good job of making all of her characters distinguishable from one another and making them feel very real. Haymitch and Effie Trinket are some more of my favorite supporting characters, too and Dory from Finding Nemo. I could go on. I tend to love supporting characters more than I do main characters. ;)


This is off topic, but any non-dessert recipes you'd like to see on the blog?
Continue Reading...

Sunday, June 2, 2013

Texas Roadhouse Sweet Potatoes

You all know those sweet potatoes at Texas Roadhouse restaurants? The ones where the skin slips right off and the inside is gooey and caramelized?


For years, I pondered how to recreate those sweet potatoes at home. It wasn't until a few weeks ago that I (actually my dad) finally figured out how to do it. And it's super easy, too!

Sweet potatoes are extremely healthy and considered a super food. Why are they a super food? Because they are a good source of fiber, extremely high in vitamin A, and they taste good! What more could you want?


I was reading a magazine a few days ago and found out that beta-carotene (vitamin A) helps to protect your skin against the sun! How cool is that? Maybe if I eat carrots or sweet potatoes or pumpkin every day I won't have to use sunscreen at all this summer. Now that would be pretty awesome. ;)

Anyways, back to the sweet potatoes. These babies are super sweet, delicious with cinnamon, and take very little prep time. The most you have to do is scrub them and put 'em in the oven. It's almost stupid to put this recipe on here because it's so simple!

4 medium-sized sweet potatoes
optional: butter, cinnamon and brown sugar, cinnamon, marshmallows, etc.

1. Preheat your oven to 400 degrees F.
2. Scrub off most of the dirt on your potatoes.
3. Line a baking sheet with parchment paper and put your potatoes on it.
4. Bake them for 50-60 minutes depending on how big your sweet potatoes are. You know they're done when you can pierce them easily with a fork.
5. During the last 10 minutes go start your grill and get it to about 350 degrees.
6. Once the potatoes are done, transfer them directly onto the grill. Turn them every few minutes. Ours normally take 10-15 minutes. You can tell they're done when the outside is kinda black.
7. Serve with butter and cinnamon.


Inquiry of the Day:

Do you eat foods high in beta-carotene every day?

I try to. In elementary school, I would take carrots for lunch almost every single day! Now I try to have some form of orange food at least once a day. I'm really looking forward to no sunscreen! ;)


Continue Reading...

Followers

Social Media